About
This Layout script will shift and or scale the keyframes of selected items. Children of a selection can also inherit the offset of the main parent item. Selected items can also have the frame offset/scale be randomized. The idea behind this script is to replicate After Effects' sequence layers function but has since grown to include features that assist with general animation.
Installation
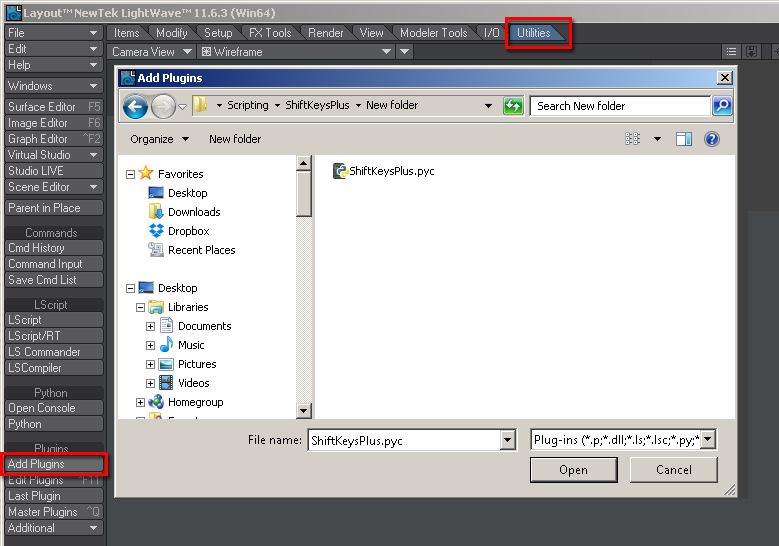
After downloading, unzipping and saving the file to your hard drive, add the scripts to Layout through the 'Add Plugins' button found in the 'Utilities' tab.
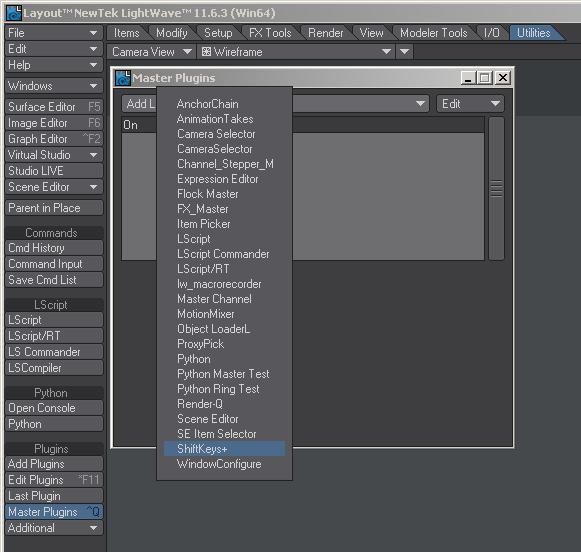
Access the script through the 'Master Plugins' window found in the 'Utilities' tab.
Licensing
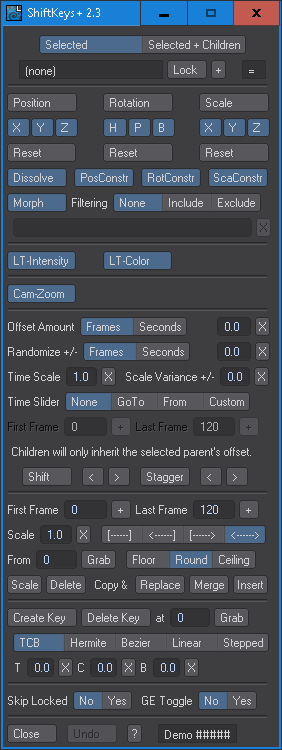
The feedback field in the ui will indicate that the script is in demo mode with the text "Demo (XXXXX)" where "XXXXX" will be your dongle id. When purchasing a license you must provide your dongle id.
An unlicensed version of the script only supports a maximum of 3 selected items at a time.
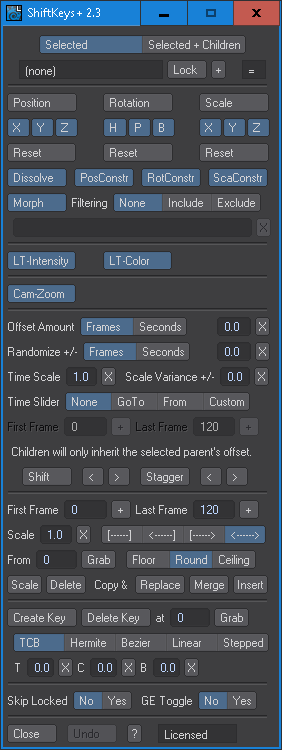
After purchasing and receiving your license, put the ShiftKeysPlus.lic file into the same folder as ShiftKeysPlus.pyc. The feedback field in the ui will indicate that the script is licensed with the text "Licensed".
Usage
Selected/Selected+Children
The choice to affect only the selected items or the selected items plus their children. Children items will inherit the offset that is applied to the selected parent. The ability to affect child items is disabled in the demo.
Lock Options
- Feedback field - This field will track your item selection. Multi-selections will display 'multiple'.
- Lock - This toggle button will keep your selection locked in ShiftKeysPlus.
- + - This button will replace the locked selection with what is currently selected.
- Relation feedback - This field will provide feedback if your locked selection matches or does not match what is currently selected. "=" means the locked selection equals what is selected in Layout. "!=" means the locked selection does not match what is selected in Layout.
Position/Rotation/Scale
The Position, Rotation and Scale buttons act as invert buttons for their respective channels. Individual channels can be enabled or disabled by toggling them on or off.
Reset
The Reset button enables all of the channels for their respective group.
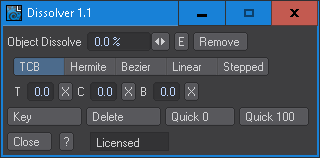
Dissolve
Affect dissolve envelopes.
PosConstr/RotConstr/ScaConstr
Affect the Postion, Rotation and Scale constraint envelopes.
Morph
Affect morph envelopes.
Filtering
Options to filter which morph envelopes should be affected. Mutliple search items can be entered by separating them with a comman. Ex. 'Blink,Smile'. This feature is disabled in the demo.
- None - No filtering will performed.
- Include - Filter by including morphs that match string entry.
- Exclude - Filter by excluding morphs that match string entry.
Filter String Field
Editable text field that will filter morph envelopes.
X
The 'X' buttons will reset the text field to blank.
LT-Intensity/LT-Color
These buttons apply any offsets to, if any, the Intensity and Color envelope of a Light.
Cam-Zoom
This button applies any offsets to, if any, the Zoom envelope of a Camera.
Offset Amount
The amount to offset, in either frames or seconds.
Randomize
The amount to randomize each selected item's offset, in either frames or seconds.
Time Scale
The amount to scale each selected item's animation.
Scale Variance
The amount to randomize the scale of each selected item's animation.
Time Slider
- None - This choice will ignore the time slider's location from all operation.
- GoTo - This choice will move the start of your selected item(s) motion to the time slider's location in time.
- From - This choice will only affect the keyframes that are after the time slider's location in time.
- Custom - This choice will unghost the numeric fields allowing you to enter in custom frame ranges to perform your operation.
First Frame/LastFrame
Numeric fields to specify the frame range to perform your operation. The '+' buttons will populate the field based on current time slider location.
X
The 'X' buttons will set their numeric field to the default values.
Shift/Stagger
- Shift - Selected item(s) keyframes will only shift.
- Stagger - Keyframe offset will increase for each selected item(s).
<< >> (Quick Shift/Stagger)
These keys perform a 1 frame shift/stagger.
First Frame/LastFrame
Numeric fields to specify the frame range to perform your operation. The '+' buttons will populate the field based on current time slider location.
Scale
The amount to scale each selected item's animation.
X
The 'X' buttons will set their numeric field to the default values.
Options for keyframes that exist outside of the First and Last Frame range.
- [-----] - Keyframess outside of the First and Last Frame are ignored.
- <-----] - Keyframes before the First Frame will retain their relative position after scaling.
- [-----> - Keyframess after the Last Frame will retain their relative position after scaling.
- <-----> - Keyframes before and after the Last Frame will retain their relative position after scaling.
From/Grab
From is a live field and will update as you scrub the timeline. Enabling the 'Grab' button will prevent the value from updating. The intent is that scaling the timing of your keyframe is based on where your timeslider is. Think of it like stretching your geometry with Mouse Center active.
Floor/Round/Ceiling
choices to apply the appropriate math to your keyframe timing after scaling.
Scale
Perform the scale operation
Delete
Delete keyframes within the First Frame and Last Frame range.
First Frame/LastFrame
Numeric fields to specify the frame range of area to copy. The '+' buttons will populate the field based on current time slider location.
Copy &
This feature will copy the animation that's defined by the First and Last Frame values and copy it to the location of the time slider. This feature is disabled in the demo.
- Replace - Copied keyframes will replace existing keyframes found at time slider location.
- Merge - Copied keyframes will merge with existing keyframes found at time slider location.
- Insert&Push - Copied keyframes will be inserted at time slider location and keyframes found at and after time slider location will be pushed down the timeline.
Create/Delete Key
Delete a keyframe at the user specified keyframe value.
at/Grab
at is a live field and will update as you scrub the timeline. Enabling the 'Grab' button will prevent the value from updating.
TCB/Hermite/Bezier/Linear/Stepped
Options to create a new keyframe based on the user's curve type choice.
T/C/B
Numeric fields that become enabled when TCB curve type choice is enabled.
X
The 'X' buttons will set their numeric field to the default values.
Skip Locked
Option to ignore items that are locked in the Scene Editor.
GE Toggle
Option to close the Graph Editor before keys are processed and to reopen the Graph Editor after keys are processed. Having the Graph Editor closed results in much faster processing.
Close/Undo
- Close - Close the panel.
- Undo - This will undo your shifted animation. Note: Only one level of undo is supported.
<< >> (Quick Shift/Stagger)
These keys perform a 1 frame shift/stagger.
?
This launches the documentation.
For additional support, please see the
FAQ page.
Change Log
2.3
2.2
2.1.2
- UI fix for Mac for scale compensation options.
- Graph Editor toggle option defauls to 'No'.
2.1.1
- Close button not destroying UI panel properly.
- Precision math fix for Round option.
- Launcher script no longer creates multiple UI instances.
2.1.0
- Morph filtering.
- Added feature to copy keyframes.
- Added feature to delete keyframes.
- Graph Editor toggle to speed up performance.
- Changes to how Custom Shift and Stagger field is calculated. User can now specify a single frame range to move a single keyframe. Previously the user had to pick a value before and after a single keyframe.
- ShiftKeysPlus will no longer persist if instance is removed from Master Plugins list.
2.0.1
- Fix Layout crash when clearing a scene after ShiftKeysPlus panel has been created and closed.
2.0
- Choice to affect children is in a different menu section as it was grouped with channel buttons.
- Section to scale the timing of keyframes.
- Section to add and delete keyframes.
1.8
- First and Last Fields query preview range, not Render Globals range.
- Panel no longer persists when scene is cleared or a new scene is loaded.
- Undo button is only active when an undo is available.
- Code cleanup.
1.7
- Add code to account for precision difference between key time and scene time.
- Changes to how envelopes are queried. This change makes it easier to support additional envelopes.
- Add support for constraint envelopes.
- Add support for Light Intensity and Color.
- Add support for Camera Zoom.
- Add option to skip items that are locked in the Scene Editor.
- Add launcher script to automatically add ShiftKeysPlus to Master Plugins and launch it or launch the existing entry if one already exists.
1.6
- Fix hierarchy crawling. Crawling through child items was terminating prematurely.
- Added buttons to get 'First Frame' and 'Last Frame' based on time slider location.
1.5
- Fix OS ui issue.
- Added quick stagger keys "<<" and ">>" to let you easily stagger by 1 frame. Scale, Rand Scale and Rand offset are ignored when using these buttons.
- GoTo option now works with Stagger.
1.4
- Changed stagger behavior to not offset the first item. This makes the behavior similar to sequencing layers in AfterEffects. This behavior has been reported to be more intuitive.
- Added the option to only shift keys that are past the time slider location.
- Added quick shift keys "<<" and ">>" to let you easily shift by 1 frame. Scale, Rand Scale and Rand offset are ignored when using these buttons.
- Option to shift or stagger based on specific keyframe range.
1.3
- Change 'Move to current time' option to use location of time slider as absolute value instead of additive.
- Changed names of menu items to make usage clearer.
- Added buttons to reset numeric fields to default values.
1.2
- Separate buttons to shift or stagger the selected items.
1.1
- Bug fix in licensing system
- UI layout optimization to address different monitor resolutions
1.0